Installation Guide
Instructions for SentryPC manual installation.
Once you have made your purchase of SentryPC, you may need assistance installing SentryPC Business on your network. We recommend using these instructions on any corporate network that has 100 or less computers in total that need to be monitored. If you need to install SentryPC on a network with 101+ computers, you may want to contact us and use our startup script paired with a network shared drive to speed up the process.
Are you updating? If you are updating to the latest version of SentryPC Business, the process is the same except you will need to uninstall the software first. The quickest way to uninstall is to log in to your SentryPC Business account, find the Reports & Archives section in the left menu, click Status Reports, then click Computers. Select all computers you want to have SentryPC uninstalled then click the red Uninstall button. Uninstalling through your online account will not lose your current logs or settings.
Step 1 - Preparation
SentryPC is a monitoring, filtering and restriction software and will often be misidentified as a virus by many antivirus or anti-malware solutions. If you are having trouble downloading your SentryPC application, consider disabling your antivirus software first. This ensures that the full application and all files included within the setup will function correctly.
For our corprate clients, we recommend using an antivirus meant for corporations because they offer a centralized console that allows for global exclusions, network wide. Avast Endpoint Protection, Symantec Endpoint Protection or AVG AntiVirus Business Edition are examples of corporate antivirus solutions that support global exclusions. If you have a corporate antivirus, then simply exclude your SentryPC setup file from being scanned.
Step 2 - Confirmation Setting and Download
Now that you are ready to download your SentryPC Business software, head to your SentryPC online account and find the accounts menu on the upper right. Click that and select the Download Software option.
From this page, you will see an option that asks if you want to "Require confirmation during installation?". SentryPC can display a confirmation dialog when you run the SentryPC setup stating that SentryPC can only be installed on computers that are owned by the person running the setup file.
Here's an example of this dialog:
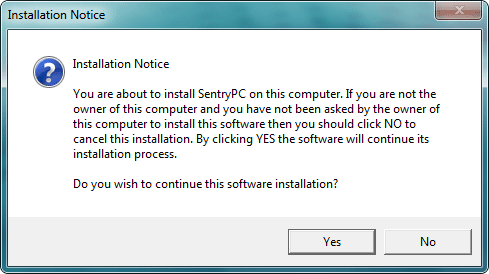
If this option is not checked, SentryPC will immediately install without this confirmation widnow.
Choose your desired option then click the download button to save the file to your computer. Once downloaded in your browser, you should be able to right click the downloaded file and select an option like "Show in folder" to open Windows Explorer.
Step 3 - Time to Install
Once you have your SentryPC Business downloaded, the next step is to roll out the software to your network. How you choose to deploy the exe file is up to you, however, we recommend creating a read-only network share drive / folder that is available to all computers on the network.
With a network share drive / folder, you can navigate to it in Windows Explorer and run your SentryPC setup file on each computer.
Otherwise, you can use a portable thumb drive to physically carry the setup file to each computer if desired. If there's another method you traditionally use to install software on your network, it will almost always work with SentryPC as well, just don't forget to follow the instructions for step 1.

When running the setup file, right click the file and Run as administrator as shown above. This will execute the install file with full administrator priveleges which ensures the software will be successfully installed with the correct permissions needed.
Step 4 - Install Notice
If you've disabled confirmation during step 2, you can skip this step. Otherwise, read the notice. If you are installing SentryPC on a computer that is owned by you or your company, click the Yes button to continue the software installation.
Once Yes is clicked, the software will be installed with no other notifications shown to you on the screen.
Step 5 - Exclusions
Congradulations! SentryPC for Business has been installed!
As we've talked about in step 1, we recommend using a corporate antivirus. This is because you will also need to add exclusions to each and every antivirus / anti-malware scanner to prevent the AV software from tampering with SentryPC's data collection process.
If you have a corporate AV solution, you'll just need to change the setting in the console and you are set, otherwise, you will need to go to each computer and set the exclusion.
Here's the folder exclusion that is needed:
For Windows Vista, 7, 8, 8.1 and Windows 10
c:\programdata\spc\
For Windows 200x, NT & Windows XP
c:\documents and settings\all users\applicationdata\spc\
Step 6 - Complete!
Now that you've installed SentryPC for Business on a computer, repeat the process on the remaining computers that you wish to monitor, filter and record. After you've installed SentryPC on all computers, consider deleting the file from your computer, thumb drive(s) and network share. If there's an update or a need for it down the road, you can always download it again from your SentryPC console.
With SentryPC installed, you will begin to see activity logs, active users, active computers and more. From the SentryPC console, you can begin setting up your configuration settings including options, filters, time management and more.
Feel free to navigate our help documentation for further assistance on all of the features made available to you.
Support Center
Is your question not answered here? Not a problem! Simply use the contact link below to ask us your question(s).